|
-Very
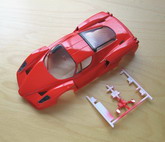
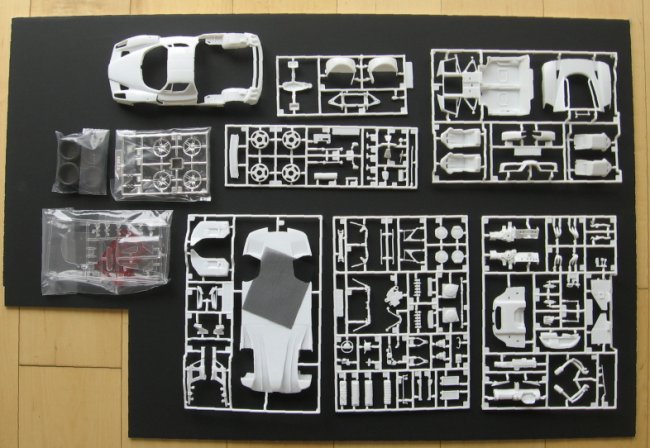
fair price for the amount of parts and treats (decals, rubber tires, chromed
parts, mesh).
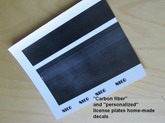
-Good decals
-Good quality clear parts
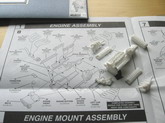
-Instructions generally good, but with some obscure areas (see below)
-Location of some items imprecise and vague (examples: parts 73-74 on 40; 45 on
44; apex of part 41 should have the flanges pointing towards part 38; pedals on
tub misleading drawing location)
-Parts 95/96 (side scoops) are reversed in the instructions. I got a headache
before figuring that out. Also 95/96 and 97/98 can be glued to the body before
you paint it. Pity I did not know that until I painted everything separately.
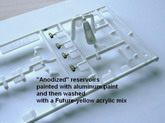
-Wrong color calls (the back of seats is black, not red; the auxiliary
reservoirs are not
aluminum color, but seem to be yellow-anodized aluminum)
-All window sills should be painted black, as well as the braces in the engine
hood. I could not find a mention of this in the instructions.
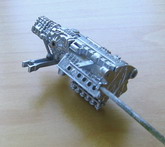
-Indifferent fit with some play at the contact surfaces (exhaust manifolds,
engine parts and details; muffler halves should have their locating flanges/tabs
removed to achieve the correct fit)
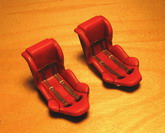
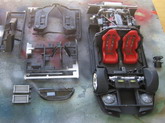
-Questionable design calls: the seat belts should have been not molded on the
seats and do not make much sense as they are positioned, they look stiff and
unrealistic. Since it is a pain in the neck to remove them and supplant them
with more credible items, I left them as they were.
|
Click on
images below to see larger images
|
|
|
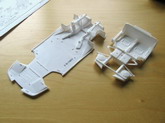
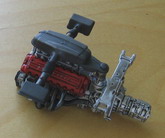
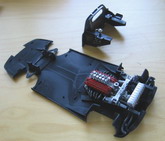
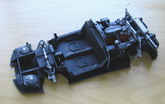
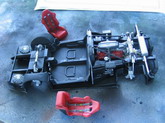
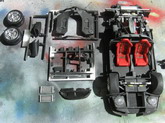
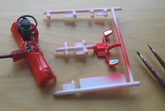
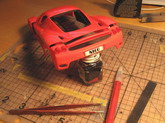
-Underpanel
(large body base piece) badly warped in my sample, engine hood also a bit
splayed out. Perhaps they were removed from the molding machine too soon or
packed with excessive pressure.
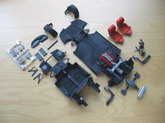
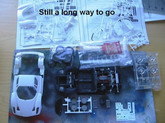
-There is neither parts’ map nor sprue coding (as in sprue A, B and the like),
in spite of the high number of both, which makes looking for small parts
sometimes fastidious.
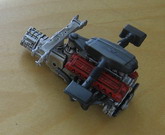
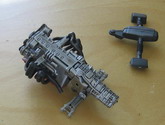
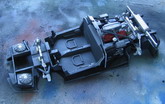
-The rear exhausts (the ones ending in chromed caps) attach to the end of the
manifolds and to the bottom of the top muffler. That comes out as a compromised
kit design call, since the fit is vague (as in everywhere else) and the position
is vague –to say the least- in the instructions. They don’t fit well under
the central muffler as designed. Dry-fitting the body helps determine where the
ends more or less should be.
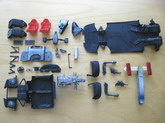
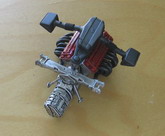
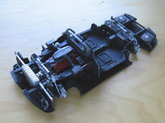
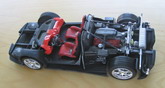
-Be very careful with the rear shafts, they are of unequal lengths (and
correctly marked A and B). The parts that will hold the wheel assemblies (67 and
69) are keyed. There is a small tab on top of it, NOT shown on the instructions,
that is either parallel or perpendicular to the shaft. The upper suspension
forks have a hole keyed likewise to accept them; again, the hole is absent from
the drawings. Details like that with slow you down until you figure it out, or
could mislead you to “correct” the part thinking is a molding flash, ruining
it.
-The front wheel assembly is made to be able to steer. For that to happen,
though, you will need to enlarge the holes of the suspension forks; otherwise
the fit is too tight.
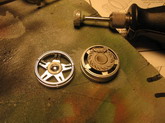
-The wheels’ chromed parts need a bit of sanding where they press against the
brake disk in order to allow rotation.
-You will need to remove some -not so prominent- ejector pin marks on the
ceiling and the engine’s hood underside before painting.
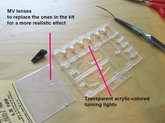
-I replaced the lenses of the lights with MV products items.
-Turning lights were colored using a mix of orange acrylic and varnish
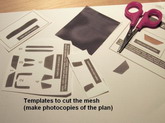
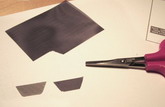
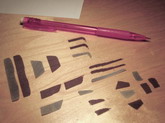
-You have to cut the mesh following the provided patterns. You do not have to
cut BOTH patterns when they are mirrored, though, since cutting two with the
same pattern will do the trick (just reverse one for the other side, since the
mesh does not have “sides”).
The plastic mesh provided is not bad, but tends to fray and deform as you cut
it. May be a metallic mesh of equal size could be used for a more comfortable
and precise cutting.
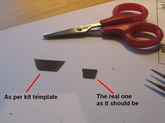
Take the patterns you are given in the instructions for cutting the mesh with a
pinch of salt, you will have to adjust those shapes against the actual
placement, some more than others.
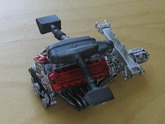
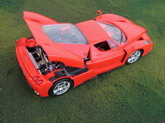
-If you plan to close the engine hood (although it is generally shown open for
the benefit of the engine detail) you will have to use your sanding stick,
before you paint the body parts, since the fit again is not precise.
-Do not glue –as wrongly indicated in step 3- the chromed exhaust tips until
the end of construction, otherwise to put the body on the chassis will be very
difficult, if not impossible. In any case, and speaking of difficulties...
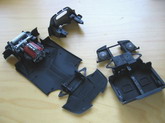
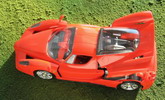
-Once
you have finished almost everything, you will now try to match the body to the
chassis. YOU ARE THERE FOR A SURPRISE, they WON’T match. After several
attempts with different approaches -and several parts of the chassis broken
attempting to carefully and artfully “put on” the body-, I had to stop for
repairs. Imagine how happy I was. Once more, I wonder if the
designers/engineers/pattern makers ever build a kit themselves from a critical
perspective. I sincerely doubt it. One thing is a computer screen, AutoCAD and
NCM, and other, very different, are real objects in space. Finally i got to glue
the body to the chassis. The fit isn't good. I had tried it before assembling
the interior, and although the fit was not by any means clean, with the interior
it was almost impossible. If you glued one side, the other will open, and
vice-versa. Not, at this stage, the model is very fragile, and boo-boos are
difficult to correct. So what was supposed to be the nice culmination of a long
effort, was a struggle to the end. Come on, Revell! Sloppy, to say the
least. I have read in reviews of this kit of similar issues; frustrating, to say
the least. In a way, reminded me of the lead that foreign cars (and kit makers)
have over American ones.
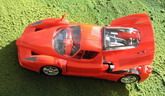
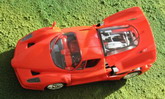
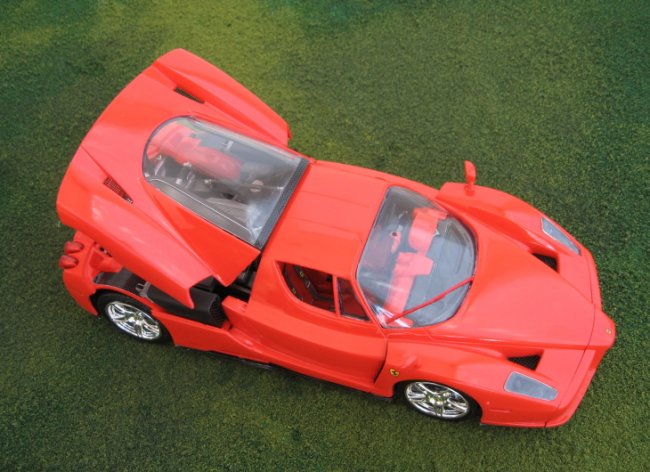
-The
transparencies are in general a good fit, but the back window -over the engine
bay- leaves a narrow gap on both sides. Those sides of the transparency, by the
way, are a tad opaque, since a mesh is supposed to be on them. Now, the quality
of the mesh, good enough if you put it behind a feature -as in the rest of car-
is not really good in this case, and to leave its ragged edges exposed -as it
would be here- wouldn’t be good, so I left those sides alone.
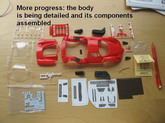
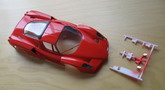
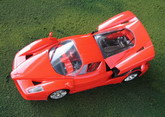
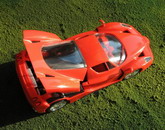
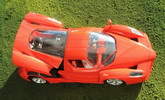
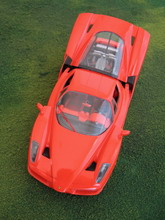
The
model once finished looks good, and other builders may tackle the kit issues in
a different way. In the general balance, given the initial cost of the kit (and
not stressing too much all the hassle) you get a very decent model for your
buck.
Now, where was that road to Malibu?
The Palos Verdes
Run-arounds
|
Click on
images below to see larger images
|
|
|
|
|
|